We imagine many of you already know some of these Tekla Structures quick tips, but we hope there are some that even the more experienced users may need to learn, so there is something new for everyone.
You can find the first 10 quick tips in part 1, and here are another 10:
– Quick Tip #11
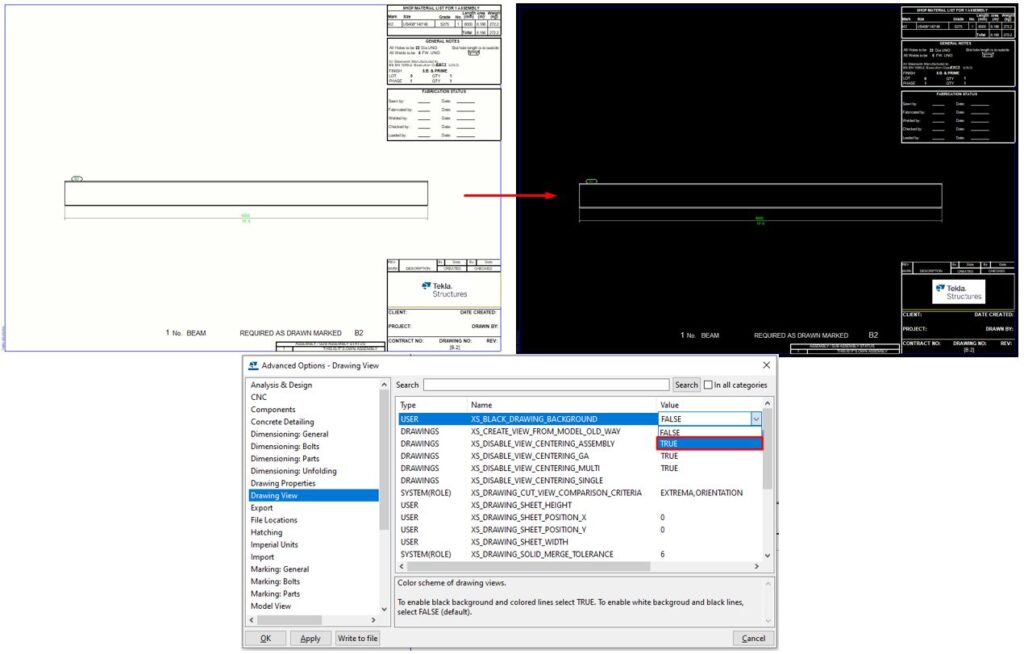
If you are used to the Autocad default preference, you can change the drawing background color to black in Tekla Structures.
Just set this advanced option – XS_BLACK_DRAWING_BACKGROUND to TRUE and reopen the drawing.
– Quick Tip #12
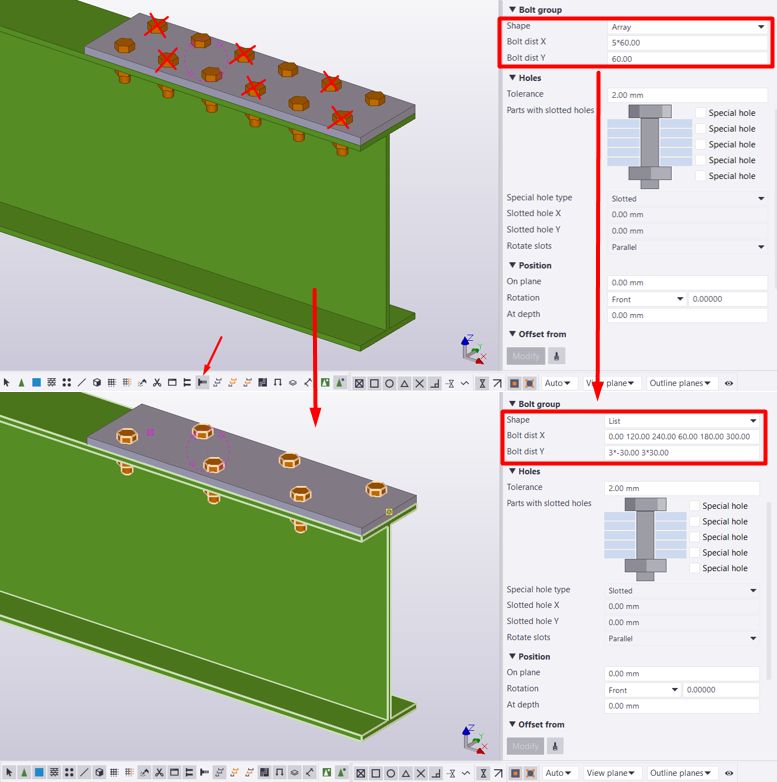
To create a staggered bolt group, you need to change the bolt group shape from an “Array” to a “List”. However, there is an easier way. First, create a standard array bolt group, switch to the single bolt selection icon, and delete the bolts you don’t need.
If you switch back to the regular bolt selection and open the bolt properties, you will see that Tekla converts the bolt group into a “List” automatically.
– Quick Tip #13
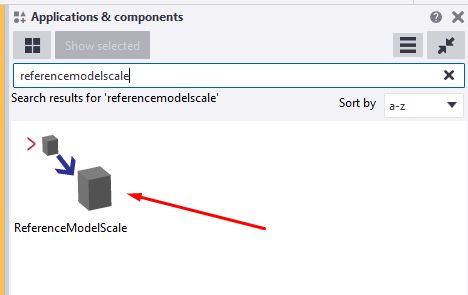
If you don’t know the exact reference drawing scale, you can use the ReferenceModelScale component from the “Applications & components” side pane. Double-click on the icon and select the pdf. Choose two points with a known distance, then provide the actual distance between the points you pick, and the reference model is scaled.
– Quick Tip #14
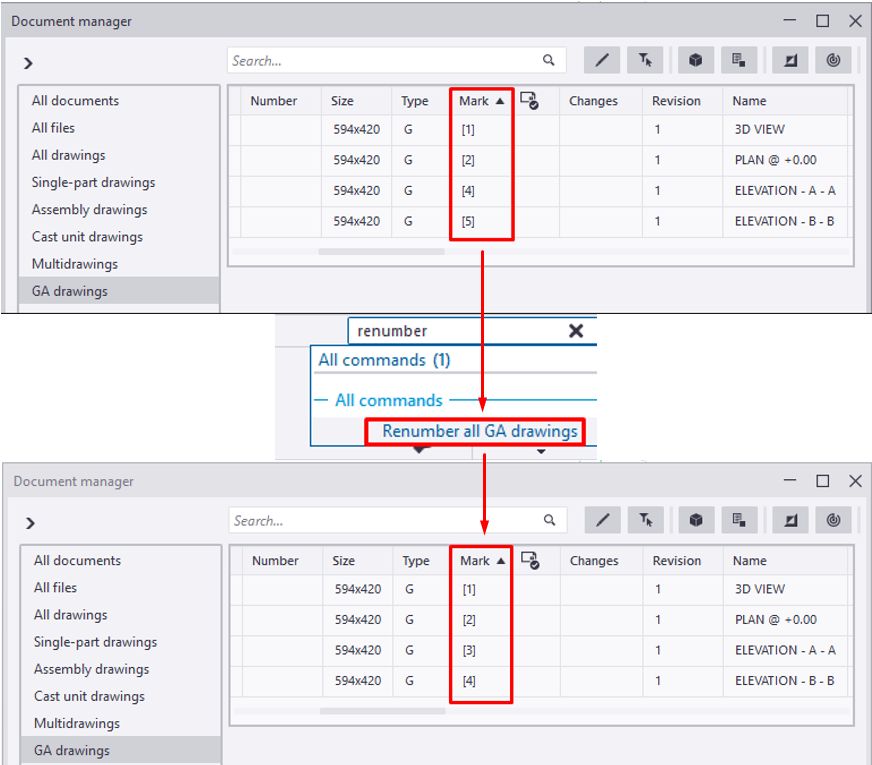
There is a way to renumber your GA drawings in Tekla Structures. For example, you have deleted one GA drawing you don’t need and want the other drawings to be in order. Use the “Renumber all GA Drawings” command from the quick launch bar, and they will automatically reorder.
– Quick Tip #15
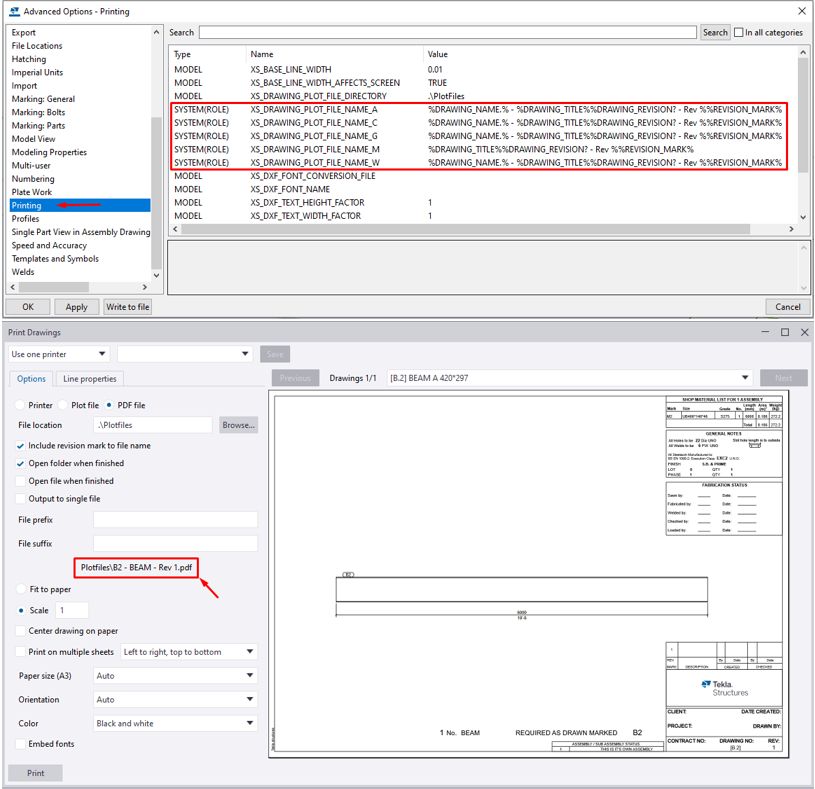
Every customer has their own requirements when it comes to naming drawings. Renaming them manually is tedious and time-consuming. But, there is a way to affect how Tekla Structures automatically names PDF and plot files using specific advanced options. Go to: settings – advanced options – printing and adjust the values of the options shown below as you want the drawing’s names to be printed.
Download our e-book with 20 Tekla Structures Tips & Tricks 👇

– Quick Tip #16
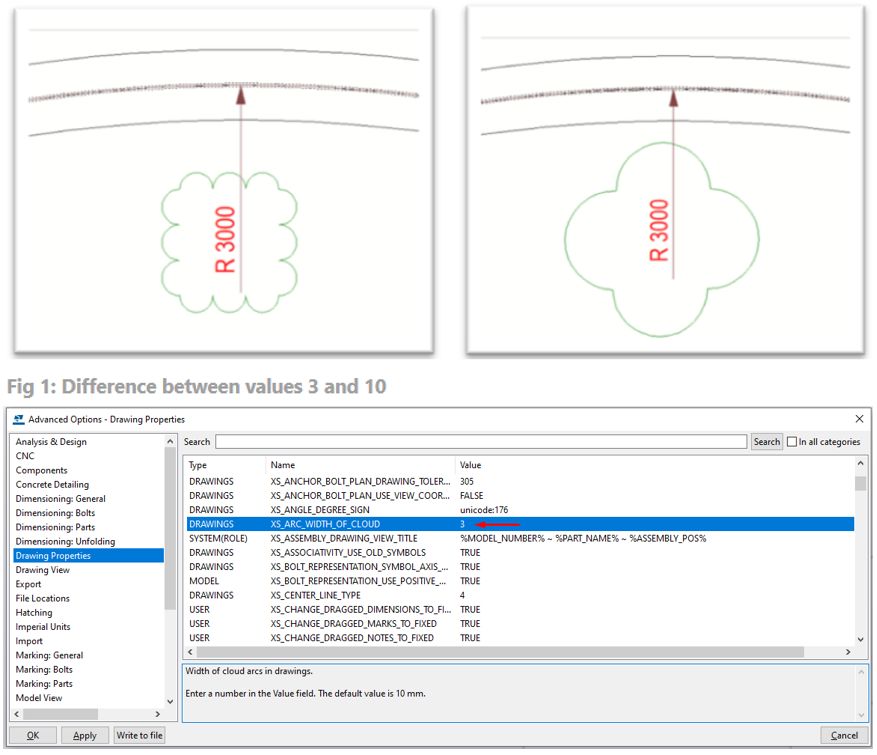
When issuing a revision pack of drawings, you usually need to mark the modified parts and dimensions in the drawing. You can do that with “draw cloud” option. In some cases, the cloud scale does not coincide with the drawing scale, and it looks messy. To make the drawing cleaner, you can change the arc width of the cloud. Go to file – settings – advanced options (Ctrl + E) – Drawing properties, and change the value of XS_ARC_WIDTH_OF_CLOUD to suit your drawing,
– Quick Tip #17
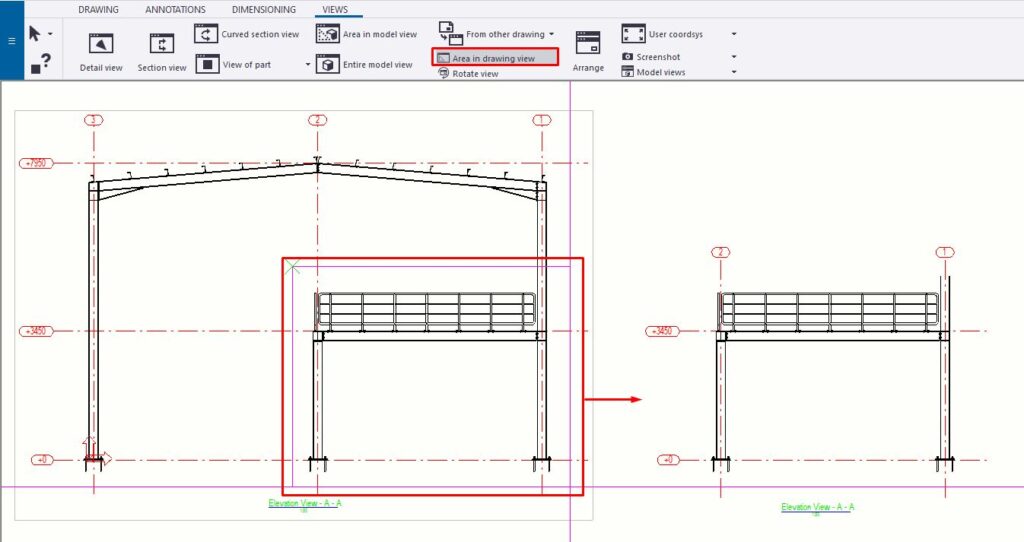
How to copy the same drawing view or area of the selected drawing view in an existing drawing?
Choose the “Area in drawing view” command on the views tab on the ribbon, select the area in the existing drawing view you want to be copied and select a location for the new view. The view properties are copied from the original drawing view.
Why is it useful?
For example, to show a view with and without cladding, maybe to show some concrete elements, different phases etc.
– Quick Tip #18
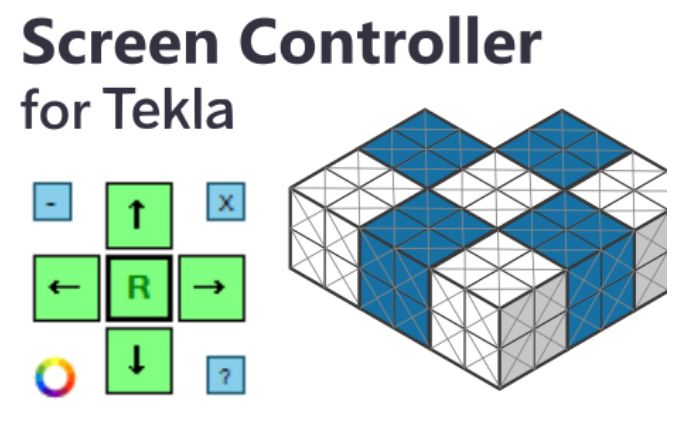
If you are using Tekla Structures on small or low-resolution monitors, you will have trouble accessing all the text fields and buttons on large and non-adjustable dialog boxes. This simple plugin, “Screen Controller for Tekla”, will solve the problem. You can download the installer from the Tekla Warehouse.
– Quick Tip #19
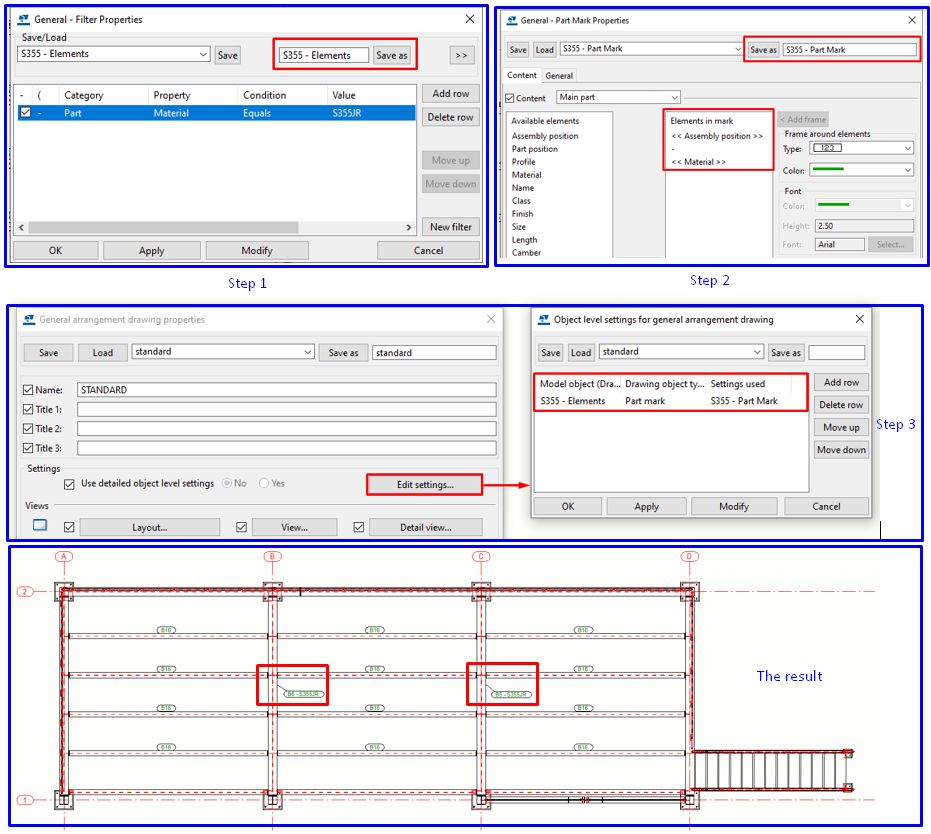
Using the object-level settings in drawings can be helpful in many cases.
For example, you want to add the material in the part mark just for S355 elements.
1. First, you need to teach the drawing how to find those elements. Create a filter as in the screenshot below and save it.
2. Second step is to assign what the drawing should do once it finds the desired elements. In our case, create a part mark properties as in the screenshot and save it.
3. Final step is to insert the rule in the object-level settings. Go to edit settings, implement the rule with the filter and the part mark properties you previously created, and click modify. The drawing should update the part marks just for the elements with the S355 material assigned.
– Quick Tip #20
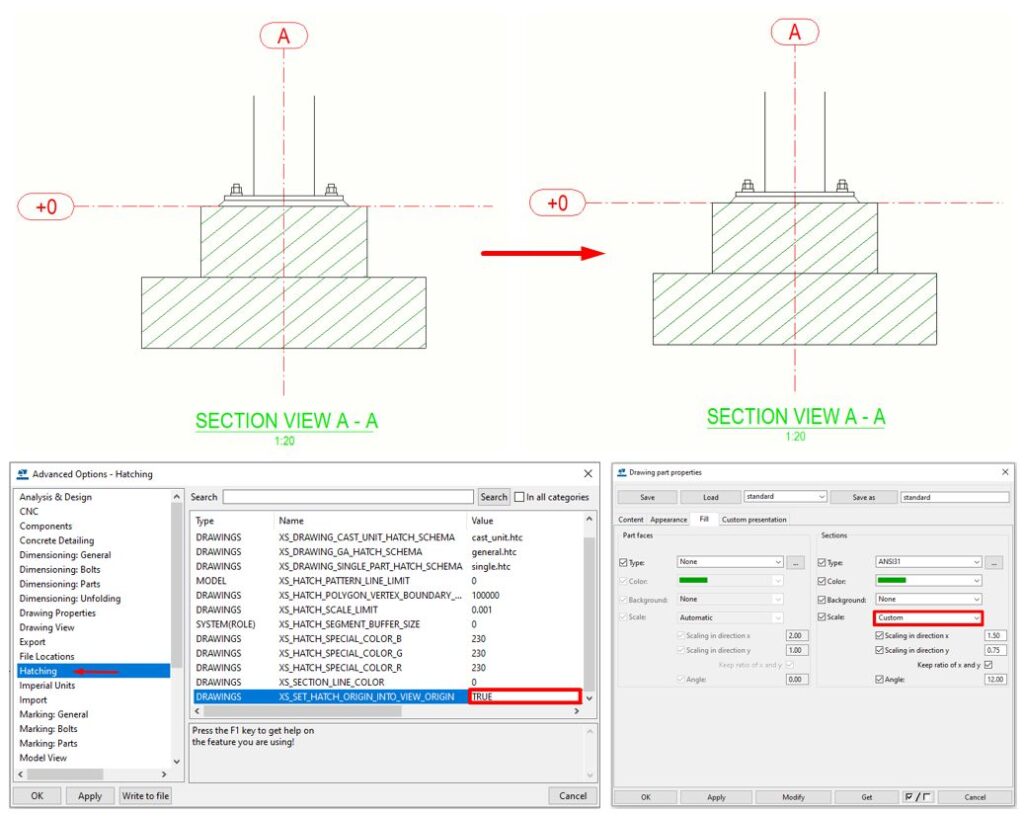
If you want the hatches between parts in drawings to be drawn continuously, you need to set this advanced option – XS_SET_HATCH_ORIGIN_INTO_VIEW_ORIGIN – to TRUE.
Also, make sure you use custom hatches and input values in the scaling and rotation fields.
If you read something you liked on our website, or we helped you with an issue, consider buying us a coffee!