Introduction
In this article, I will list the most used Tekla components while modeling steel structures. There are three types of components:
- Connections – connect two or multiple parts, and create all the required objects such as parts, bolts, cuts, fittings, and welds.
- Details – add a detail to the main part, so they are connected to one part only.
- Detailing components – automatically create the parts to build a structure, but do not connect the structure to existing parts.
Setting up these can speed up your work and reduce the chance of making mistakes. Most of them are installed by default in Tekla Structures, and some are available in the Tekla Warehouse.
1. Cranked beam (41)
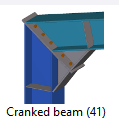
This component joins two ends of a beam. The beam ends are fitted to an angle that is an average of the angles of the beam ends. You can also create a plate between the elements as well as haunches. But in my experience, it is mainly used for creating miter cuts. The members are automatically welded, and you can also define the weld type and size. You can use this component for every kind of profile, including tubular shapes.
2. End plate (144)
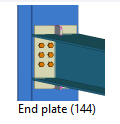
With this component, you can connect two beams or beam to a column using a bolted end plate. The second part can be sloped, leveled, squared, or skewed. All kinds of end plate connections can be created, like full depth end plate connection, partial depth end plate. There are options for creating haunches, shims, stiffeners, and notches if needed.
3. Shear plate simple (146)
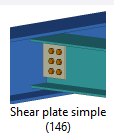
This component is used to connect two beams or a beam to a column with a single or double square shear tab. The shear tab is welded to the main part and bolted to the secondary beam web. There is an option to add a stiffener plate on the opposite side of the main part, haunch plates, and seat angles.
4. Joining plates (14)
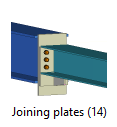
This component is practical when you want to connect two beam ends. Two end plates welded to the beams are created and connected with bolts between them. Also, you can add shims for spacing between the plates as well as stiffeners.
5. Base plate (1042)
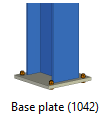
To create a base plate with anchors, this component is a must. It creates an end plate welded to the column and connected to the base with anchors. It also allows adding cast plate for attaching the anchors and grout – which is helpful to model columns correctly on top of concrete parts.
6. Stiffeners (1003)
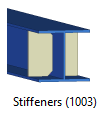
Use this component to automate adding stiffeners to your model. Choose the thickness, width, and height tolerances between the flanges of the I beam, and you are done.
7. End plate detail (1002)
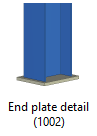
This component creates an end plate welded to the beam/column end. It is simple to use but can save you a lot of time.
8. Fitting (13)
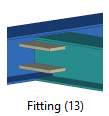
This component is quite handy to connect two beams using welds, so you don’t have to create a new view and use line cut, part cut, etc.
9. Swap handles
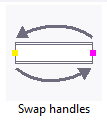
This macro changes the start and end points of the selected object. It is beneficial for asymmetric shapes like angles and channels when you try to rotate them the right way. The start and end point of the beam have other roles too. For example, when you are using ‘copy to another object’, the marks in the drawings are added relative to those points, etc.
10. Bolted gusset (11) & Tube gusset (20)
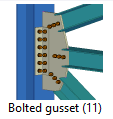
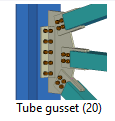
These two components help you connect your bracing profile to a column or a beam with a gusset plate. Whether you are using a hollow/tube profile or open section as a bracing, you choose one of these accordingly. The gusset plate can be bolted or welded to the main part and the bracing. Additional clip angles can be added, and the hollow sections can be sealed with end plates.
Download our digital poster of the 20 most used Tekla Structures Components 👇
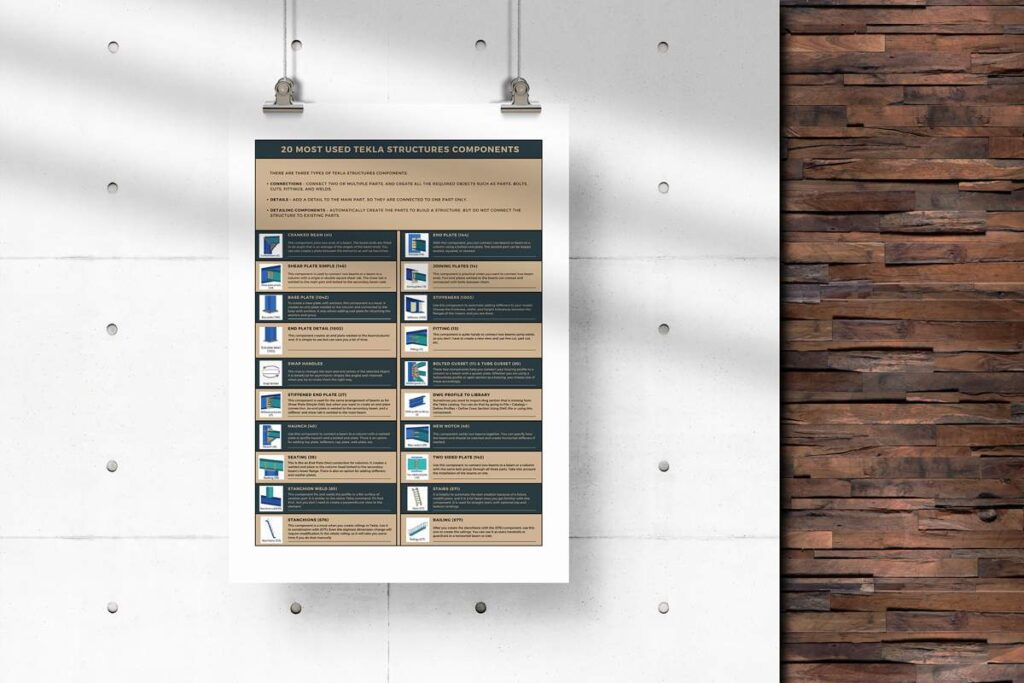
Let it be your constant reminder, right there on your wall, making your work more efficient and enjoyable.
11. Stiffened end plate (27)
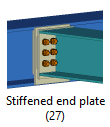
This component is used for the same arrangement of beams as for Shear Plate Simple (146), but when you want to create an end plate connection. An end plate is welded to the secondary beam, and a stiffener and shear tab is welded to the main beam. The plates are connected with bolts.
12. DWG profile to library
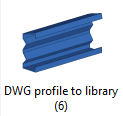
Sometimes you want to import dwg section that is missing from the Tekla catalog. You can do that by going to File > Catalogs > Define Profiles > Define Cross Section Using DWG file or using this component. Insert all the information, click apply, and pick two points in the model. You need to re-open the model for the profile to be visible in the catalog.
13. Haunch (40)
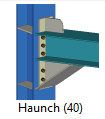
Use this component to connect a beam to a column with a welded plate or profile haunch and a bolted end plate. There is an option for adding top plate, stiffeners, cap plate, web plate, etc.
14. New notch (49)
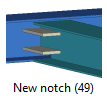
This component welds two beams together. You can specify how the beam end should be notched and create horizontal stiffeners if needed.
15. Seating (39)

This Is like an End Plate (144) connection for columns. It creates a welded end plate to the column head bolted to the secondary beam’s lower flange. There is also an option for adding stiffeners and washer plates.
16. Two sided plate (142)
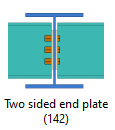
Use this component to connect two beams to a beam or a column with the same bolt group through all three parts. Take into account the installation of the beams on site.
17. Stanchion weld (85)
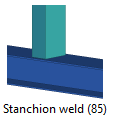
This component fits and welds the profile to a flat surface of another part. It is similar to the native Tekla command ‘Fit Part End’, but you don’t need to create a perpendicular view to the element.
18. Stairs (S71)
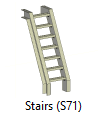
It is helpful to automate the stair creation because of a future modification, and it is a lot faster once you get familiar with this component. It is used for straight stairs with optional top and bottom landings. You can create stringers, steps, landings, brackets, plates. Be aware of the selection order when you use the component.
19. Stanchions (S76)
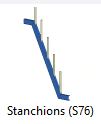
This component is a must when you create railings in Tekla. Use it in combination with (S77). Even the slightest dimension change will require modification in the whole railing, so it will take you some time if you do that manually. You automatically create the first, last, and middle stanchions with this component. Stanchions can be placed on one or more horizontal or skew profiles as well as on concrete slabs.
20. Railing (S77)
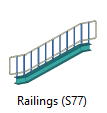
After you create the stanchions with the (S76) component, use this one to create the railings. You can use it as stairs handrails or guardrails in a horizontal beam or slab. You choose the type of the railings, the number of rails, type of infill profiles, rail profiles, etc.
Honorable mentions:
- Multi converter
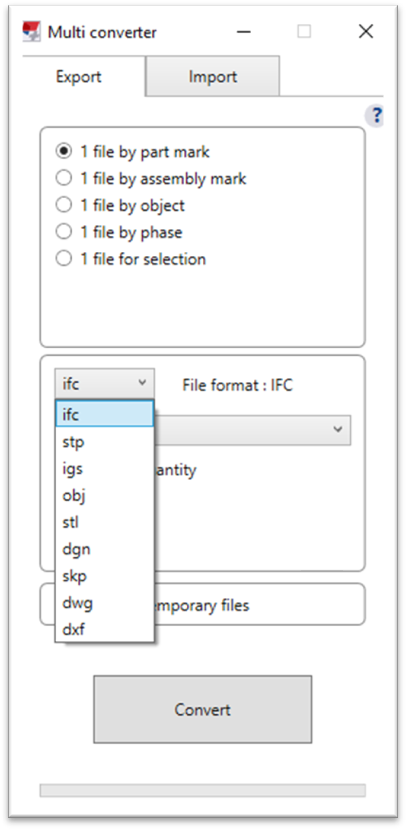
You can download this tool from Tekla Warehouse. It can export Tekla Structures elements in multiple file formats: IFC, STP, IGES, OBJ, STL, DGN, SKP, DWG, and DXF. Files can be exported by part mark, assembly mark, object ID, phase, or selection. You can also import files into the shape catalogs with the Multi converter. You can read more about file types and their application in this article.
- Excel to drawing
This tool comes very handy when you need to import Excel tables into your drawing. You can import formatting options from Excel or override them. It is simple to use but really useful. It is available for downloading from Tekla Warehouse.
- Publish to 3D-PDF tool
This tool is also available in the Tekla Warehouse. It enables you to export your model to a 3D PDF. It makes communication with others easier because they only need a PDF reader to preview the model.
If you read something you liked on our website, or we helped you with an issue, consider buying us a coffee!