Everyone makes mistakes when they start learning something new. This article will cover some mistakes that might happen when you first start using Tekla Structures.
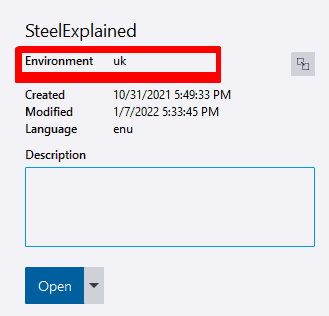
1. Choose the right environment
If you open an existing Tekla Structures model in a wrong environment, it will certainly cause errors. Every environment has a different profile and bolt catalogs, so there will be missing elements and missing bolts. The object classes and material may also differ. So be really cautious and double-check the environment before opening the model.
2. Learn the difference between the selection modifiers
You will notice a significant improvement in your Tekla modeling once you master the selection modifiers. Each of them has a different purpose and is designed to help you better manipulate your model. There are four of them, and ‘select tasks’ also which is less commonly used.
- Select components
- Select objects in components
- Select assemblies
- Select objects in assemblies
3. The right way to rename your model – if your really need to!
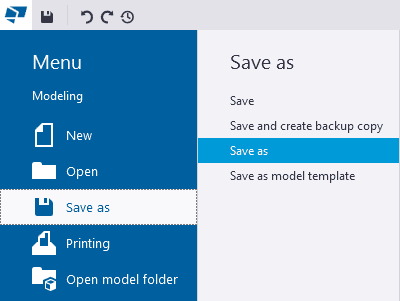
This mistake is a basic one, but I have seen it happen. So if you, for whatever reason, want to rename your model, don’t ever rename the model folder with a right-click and ‘rename’ option. Tekla Structures won’t open the model afterward. You also need to rename the .db1 file to match. So the right way is to use the Tekla Structures option from the menu and choose ‘save as’. But it is not recommended to rename the model as all the GUID’s will change.
4. Use Shortcuts!
If you want to improve your Tekla Structures performance, you need to set up your own keyboard shortcuts. You can choose shortcuts for modeling as well as when working with drawings. To do that, go to File – Settings – Keyboard shortcuts. It will take you some time but will give you benefits in the long run.

Download our e-book with 20 Tekla Structures Tips & Tricks 👇

5. Customize ribbon, contextual toolbar, application & components catalog
Take the time to customize all these things to suit your or your company’s needs.
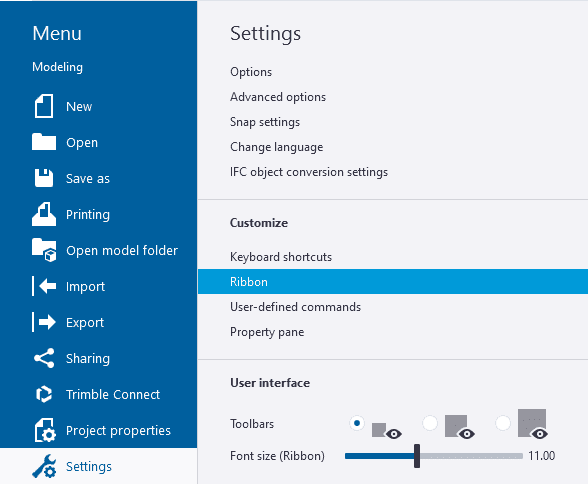
Customize ribbon your own way, you can change the font size, items layout and appearance, or add commands that you use regularly. Go to File – Settings – Ribbon to modify it.
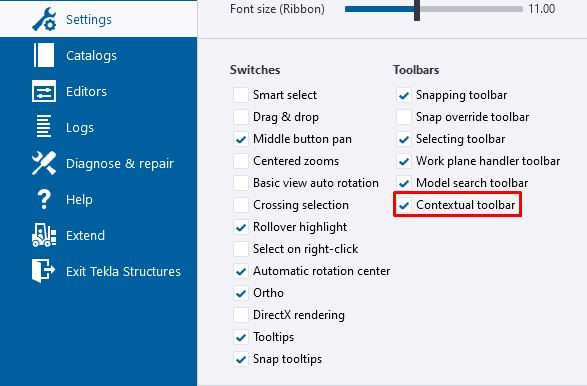
The contextual toolbar is also helpful, although sometimes it can be a little annoying showing in your pointers way. Add your most used commands so you can access them easily. Just make sure you have turned it on in the settings menu.
Applications & components are already shown in categories but it is good practice to create your own folder and put the most used ones in there. Also, try to save the settings in every component for different profiles.
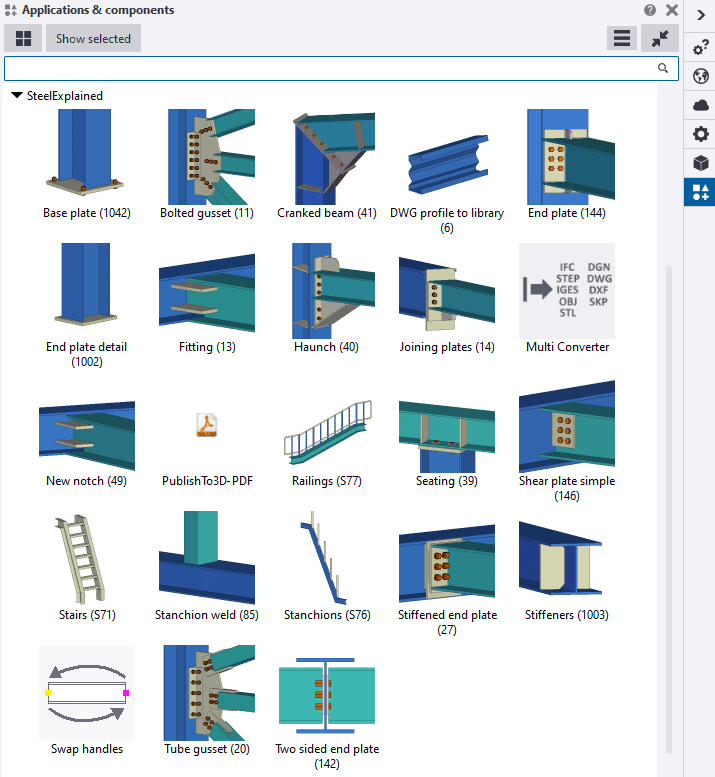
6. Use the components!
It is fine to know how to model all the details manually. But when you do repetitive work, using components is a must because it will drastically speed up your work and reduce the chance of making modeling mistakes. If you take the time to set up the settings for the most used ones for different profiles, that is a game-changer for you and your clients. So try to use them whenever possible, and learn how to create your own custom components.
7. Fatal: Model on disk is corrupted, use the latest backup model. Please run check disk on your drive.
You can get a Tekla Structures warning that the model on disk is corrupted, use the latest backup model.
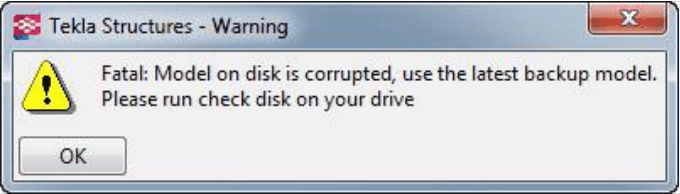
You can solve this by opening the automatically created backup file from your model. All you have to do is delete the model.db1 and model.db2 files from your model folder, and rename model.db1.bak and model.db2.bak to model.db1 and model.db2.
8. Define common modeling rules
Before starting a project, you need to have clearly defined modeling and drawing rules proposed by client needs or yourself. By rules, I mean:
- Fill in the project properties
- Prefixes for all types of elements
- Classes of the elements
- Type of material
- Model phases
- Numbering settings
- Hole tolerances
- Dimensioning style
- Drawing templates
- Report layouts
- NC data settings
- Print options and line properties
Setting all these things in the beginning will lead to a more correct and tidy model.
9. Position the model near 0,0,0 and use the base point feature
You can adjust the datum level of the model by changing the value of elevation in the base point menu. This is helpful when you want to show the model’s elevation in the real world. By default, the datum level is set to 0, which means that the 0 level in the model has no offset.
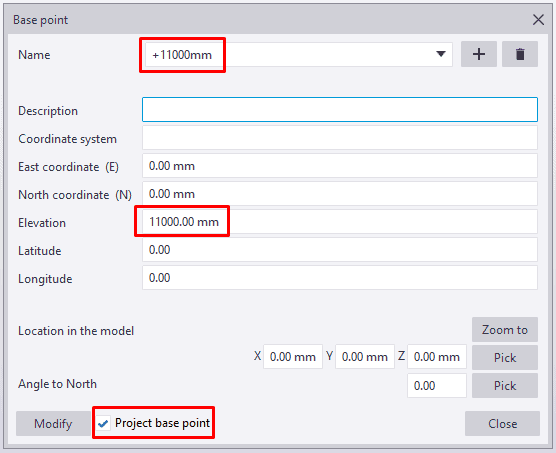
For example, suppose you are modeling a canopy on a rooftop. In that case, It is much better to lower your model closer to 0 and use the base point to adjust the elevations on the drawings rather than to put your model thousands of millimeters above 0.
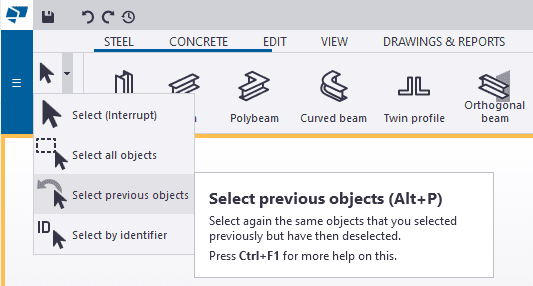
10. Bring back your previously selected objects
There is a way to bring back your previously selected elements. Why is this useful? Sometimes, when you select elements one by one and accidentally forget to hold the ctrl key in the process, the selection is gone. You don’t have to start from the beginning, but use this feature ‘select previous objects’, either from the menu or the Alt+P shortcut, and the selection will be restored.
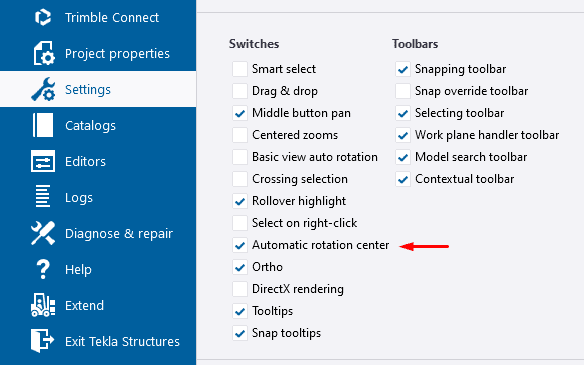
*Bonus Tip: Enable automatic rotation center!
Always enable the ‘automatic rotation center’ to allow smooth rotation of the model. Also, make sure that you aim at something when you rotate the model. The rotation can be a little weird if you aim at the grey space as the center point can be far away from the model.
If you read something you liked on our website, or we helped you with an issue, consider buying us a coffee!