In this article I am sharing 10 quick tips that I am using when working with Tekla Structures. I hope they will be useful and increase your productivity.
– Quick Tip #1
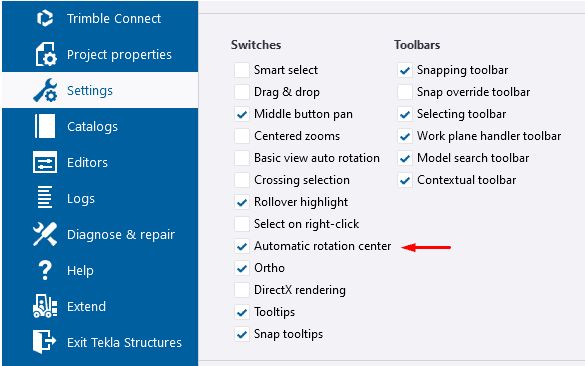
Always enable the ‘automatic rotation center’ to allow smooth rotation of the model. Also, make sure that you aim at something when you rotate the model. The rotation can be a little weird if you aim at the grey space as the center point can be far away from the model.
– Quick Tip #2
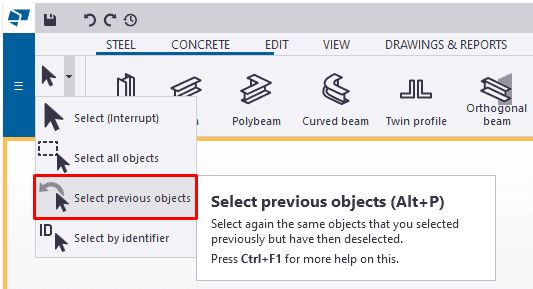
There is a way to bring back your previously selected objects. Why is this useful? For example, when you try to select objects one by one and accidentally forget to hold the ctrl key in the process, the first set of the selection gets lost. You don’t have to start from the beginning, but use this feature “select previous objects”, either from the menu or the Alt+P shortcut, and the selection will be restored.
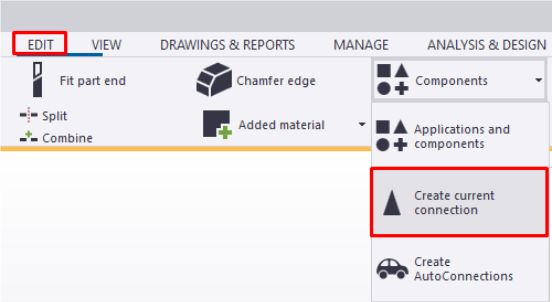
– Quick Tip #3
Many people who start using Tekla Structures don’t use the “create current connection” feature. It is really handy to create a Tekla component, connection or detail, using the component tool you used last with its current properties, so you don’t have to search for the same component again in the “Applications & components” sidebar. Assign a keyboard shortcut for easy access to the command.
– Quick Tip #4
The default setting in some environments for column marks on GA drawings is set to 45 degrees. If you want to place the marks horizontally go to (file -> settings -> advanced option (Ctrl + E) -> Marking: parts) and change the value of XS_DO_NOT_DRAW_COLUMN_MARKS_AT_45_DEGREES_IN_GA_DRAWING to TRUE. Reopen the drawing for the change to take effect.

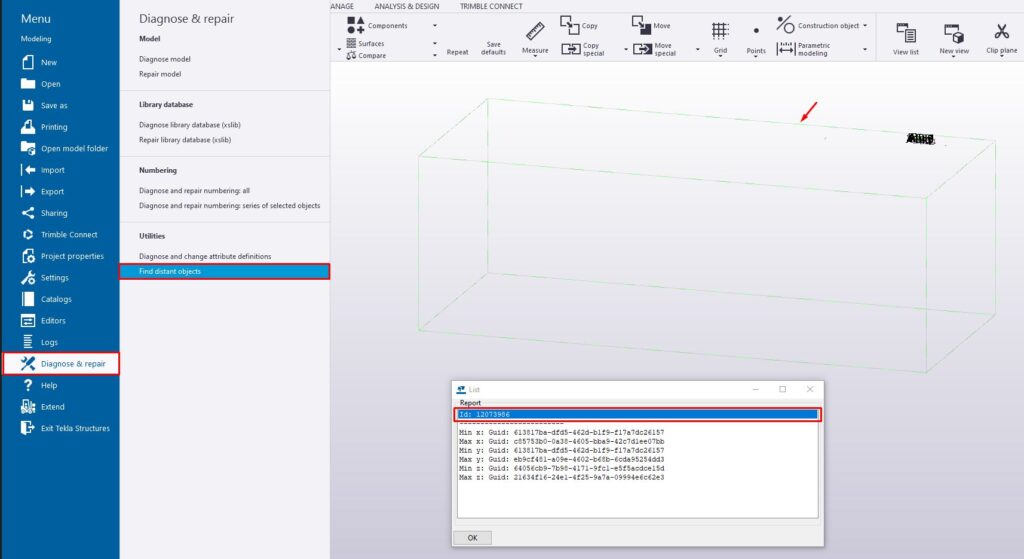
– Quick Tip #5
How to fix a large modeling work area after the “Fit work area to entire model” command is executed?
Go to File – Diagnose & repair – Find distant objects.
Tekla will list all the distant object IDs. Then you can choose to inquire or delete the object by right-clicking on it. It is usually some distant point, construction line etc.
An alternative method is to select everything by pressing Ctrl+A with all of the selection switches on, then deselect the model using area selection and holding ctrl, press delete and click the “Fit work area to entire model” command.
Download our e-book with 20 Tekla Structures Tips & Tricks 👇

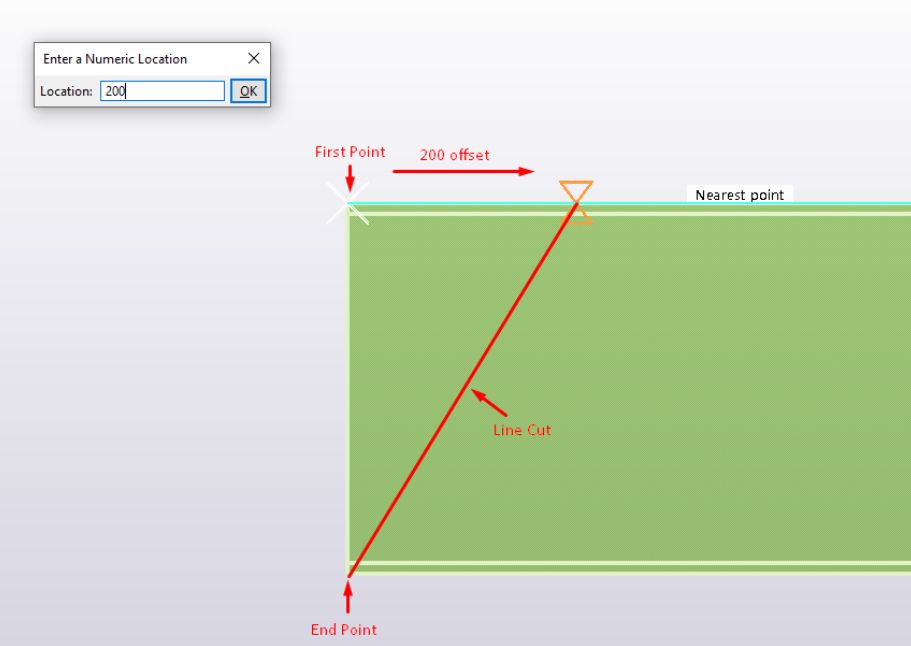
– Quick Tip #6
Holding CTRL while moving/cutting in Tekla Structures offsets the first point. There are many ways to use this feature. For example, when manually creating an angle cut on a profile, hold CTRL while you click the first point, enter a numeric number for the horizontal distance or pick a distance with the cursor and finish the cut in the opposite corner.
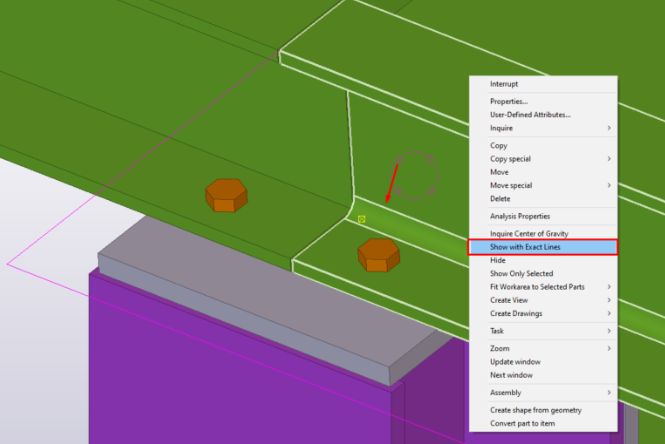
– Quick Tip #7
“Show with Exact Lines” command is useful when you want to check for clashes between elements or bolts with elements. For example, when you want to check the distance between the bolts and the profile radius. Right-click on the element and choose “Show with Exact Lines” while holding SHIFT.
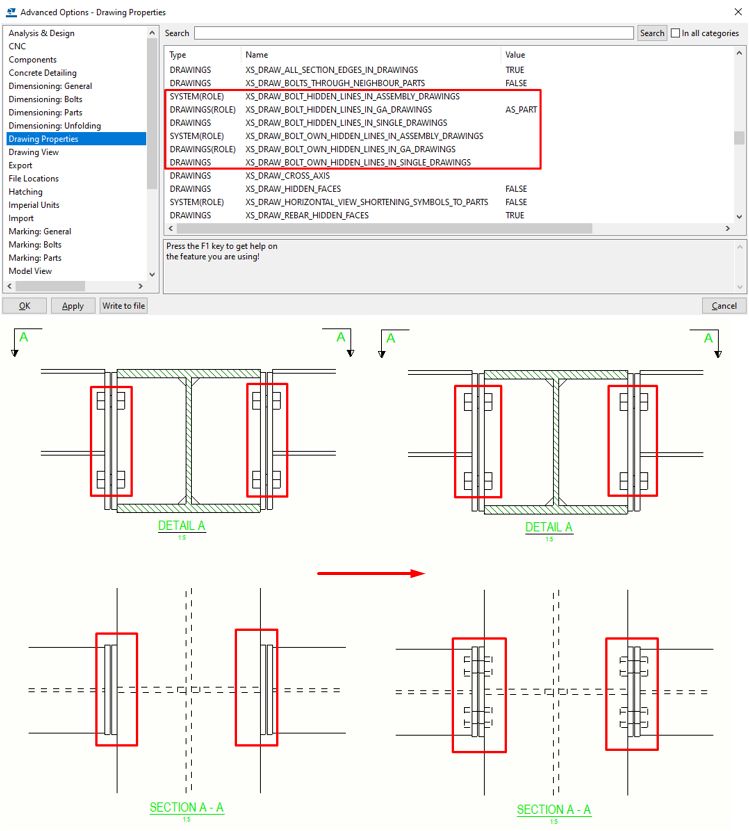
– Quick Tip #8
Solid bolts and studs that are behind other objects are hidden in drawing views by default. To show them, you need to modify these advanced options (see photo). You need to change them to TRUE or AS_PART. Be aware that they will not show in the existing views. The modification will apply to the created views after changing the advanced options. So you need to re-create the view to make the bolt hidden lines visible.
– Quick Tip #9
When you try to dimension radiused or curved sections and pick three random points from the member centerline, you will often come up with incorrect dimension strings.
To get an accurate radius dimension, you need to select the segments that the member is made of. The curved member is automatically segmented by Tekla, even if you can’t see it. You can adjust how smooth the curve is visually, but it is still composed of segments. You need to use snap override, choose “end,” and then search for the segment end. Repeat that for all three points required to measure the radius.
An alternative way is to turn on the reference line of the part and click on those three points.

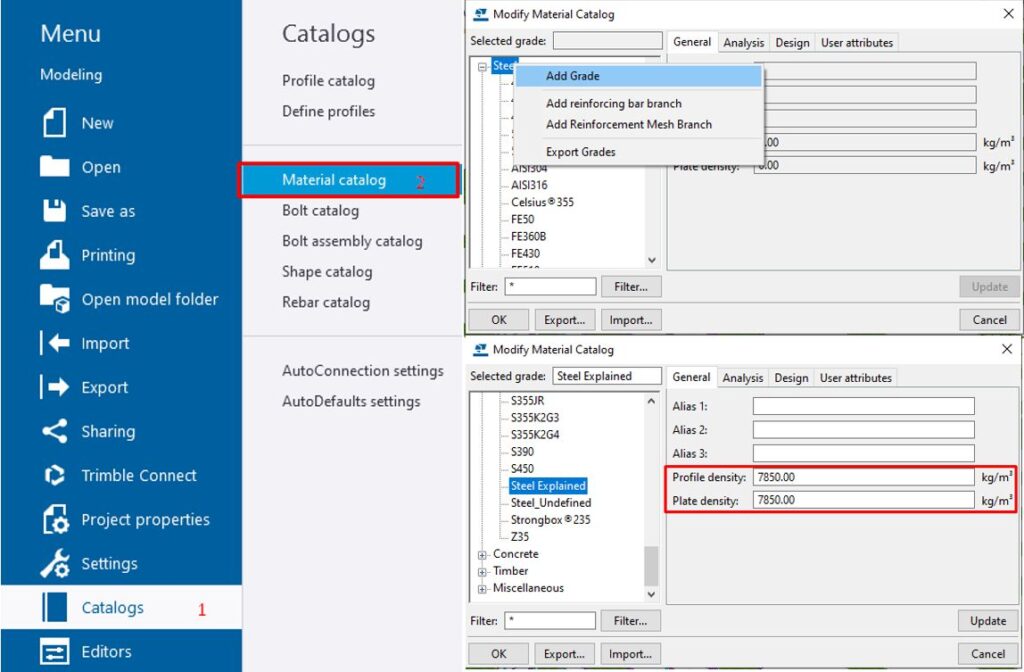
– Quick Tip #10
Sometimes there is a need to create new material in Tekla Structures. To do so, open the material catalog: File – Catalogs – Material Catalog. Right click on steel and choose add grade. Rename the grade as you wish and fill in the required fields.
If you are not using the analysis and design options in Tekla Structures, adding profile and plate density is enough because they are necessary to calculate the weight of the elements.
Look for the next 10 tips in part 2.
If you read something you liked on our website, or we helped you with an issue, consider buying us a coffee!