Introduction
In this article, I will explain the model view settings. Setting up the view properties can ease your life while working in Tekla Structures. To open the view properties dialog box, double click in the view background, or click the ‘View properties’ button in the ribbon.
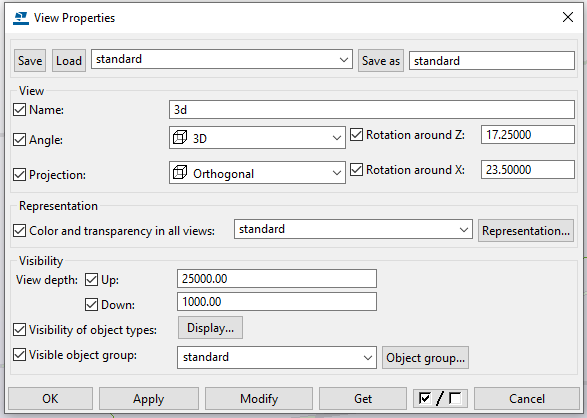
1. Let’s start with the first one, Name.
It is important to name all the views in your project. That way, it is easier for you to switch between the different views. All unnamed views, whenever the name is in parentheses, will not be added to your view list.
2. Angle
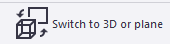
Here you can choose between 3D and Plane. It is the same option as the button on the view ribbon ‘Switch to 3D or plane’.
3. Projection
You can choose between two types of views in this field, orthogonal and perspective. It is recommended to use orthogonal projection in everyday work. You should switch to perspective if you want to use the Fly command.
4. Rotation around Z and X
These values are automatically changed as you rotate the model, but you can manually set them to get the desired view. For example, setting rotation around Z to 0 and around X to 90 will give you a plane view in a case of a default work plane.
5. Representation
Use this option to assign the color and transparency of model objects in all model views. Also, you can create customized presentations to show certain objects with the same color or find and eliminate model mistakes. There are various ideas where you can use different object representation templates. I will give you a few examples to get the idea.
- Show model phases
- Show installed elements
- Bolt sizes
- Bolt workshop/site
- Material grades
- Steel plate thickness
- Show locked objects
- Show unnumbered elements
- Element weight, length, or height.
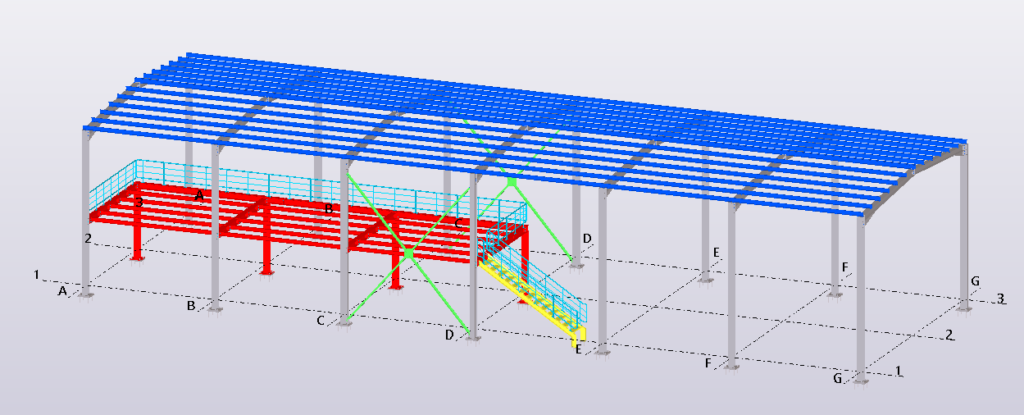
If your model is split into phases and you choose ‘Color by phases’, it will show all your phases with different colors.
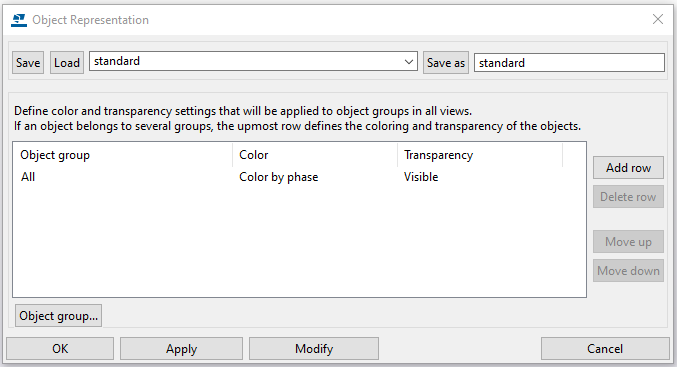
Below is an example where all different phases are shown with different colors”
- Frames = grey
- Platform = red
- Bracing = green
- Purlins = blue
- Railings = cyan
- Stairs = yellow
6. View depth
Here you define the depth upwards and downwards from the view plane. Only the objects between these values will be visible in the model. An example of this is you can use the Up and Down values only to show one floor at a time.
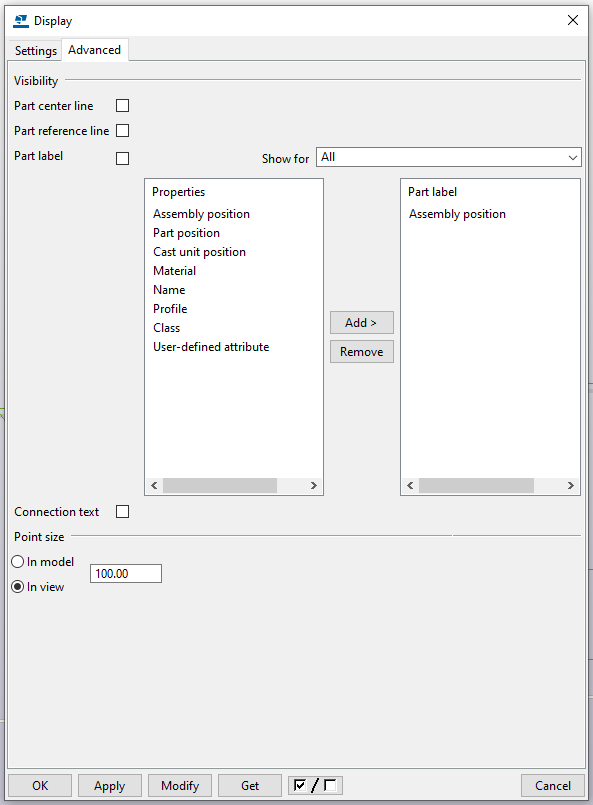
7. Display settings
Display settings are used to filter what is shown on the view. There are two columns of checkboxes, one for parts in the model and one for parts inside components. For example, I use the settings from the screenshot below. Bolts and Holes are shown as exact. Usually, I turn off the welds. I turn on Cuts, Fittings, and construction lines as needed. The Grids and Reference objects are always on. If you work with a more complex model, you can set the bolts to ‘fast’ so it goes smoother.

There are also some handy options in the advanced tab. For example, I turn on the part center line when I work with tube sections. And I use part label occasionally when I make screenshots for RFI, etc.
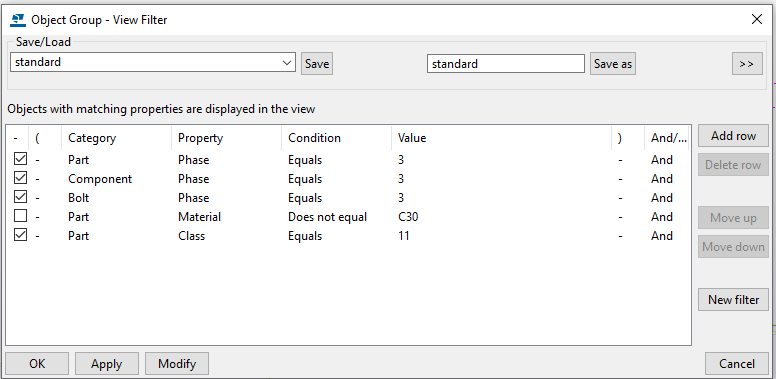
8. Object group
This is another option that must be known when working with Tekla Structures. It is a view filter for object groups. You can group parts and other objects based on their properties. All user-defined attributes can be used as well. For example, you want to show just one phase you are currently working on or export a report from that phase. Combine part, component, and bolt category to get all elements from that phase. Or maybe you want to hide the concrete parts, show objects with the same class, etc.
If you read something you liked on our website, or we helped you with an issue, consider buying us a coffee!