In this article, we are sharing 7 useful tips for Tekla Structures beginners to help you get started with your Tekla Structures journey.
1. Remove Revision Clouds From Tekla Structures Drawings
After you modify the model, Tekla Structures automatically put revision clouds in the drawings for the changed elements. To remove all of them quickly, open the “Applications & components” sidebar, search for the “Remove change clouds” macro, and double-click on it.

2. Move Part Marks Holding Shift
If you just try to move the part mark with the left mouse button, you will only move the frame with the mark while the leader line start point will stay at the same place.
Drag and drop the part mark while holding shift to move the mark with the leader line.

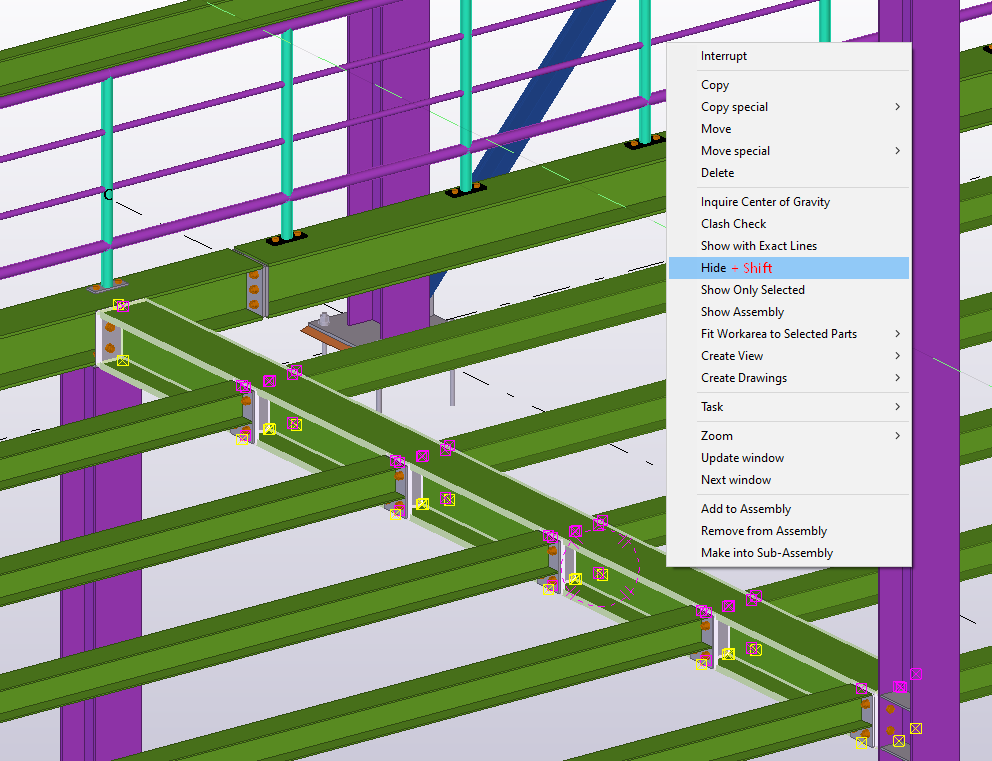
3. Hide Model Objects Holding Shift
Sometimes you need to hide some elements from the model temporarily. If you do it by right-clicking and choosing hide, the reference line of the object will still be there. So, to completely hide the model object, you need to hold shift while you click the hide option.
Download our e-book with 20 Tekla Structures Tips & Tricks 👇

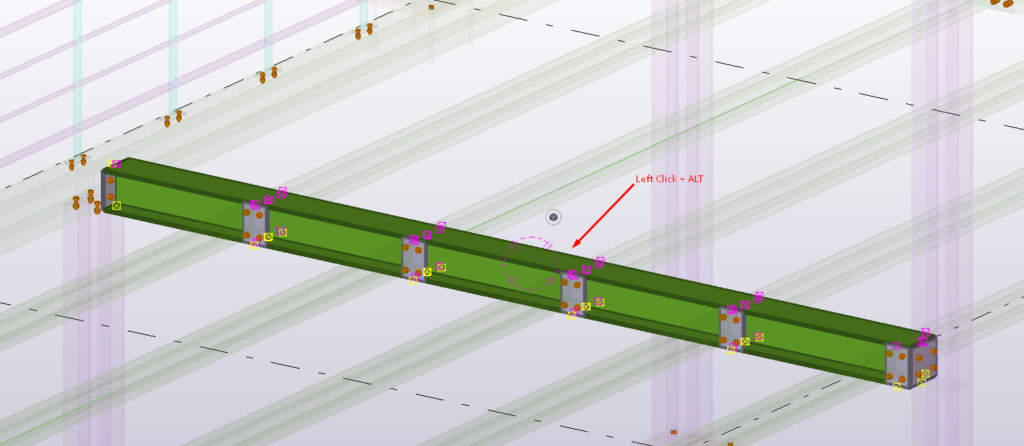
4. Select Assembly Elements Holding ALT
If you want to quickly select all the elements of an assembly, for whatever reason, maybe to hide it, show only that assembly, inspect the assembly, etc., you need to hold ALT and left-click on any element of the assembly.
5. Learn The Hierarchy Levels In Tekla Structures Drawings
The different levels of setting up the drawing properties are confusing to every new Tekla Structures user. Let’s make them clearer to understand.
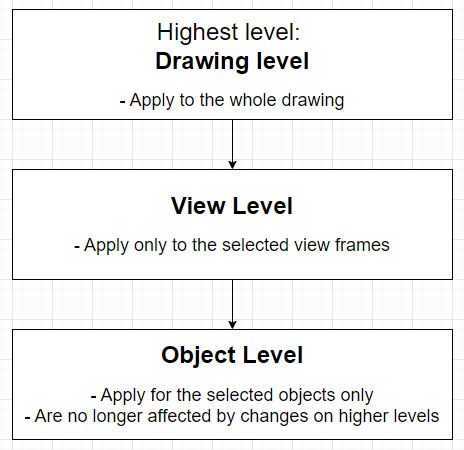
There are three levels on which you can change drawings: drawing, view and object level.
- The drawing level is the highest, and its properties affect the whole drawing. You can set up these properties before or change them after you create the drawing.
- View level affects only the selected view frames in an open drawing. You can access these properties when you double-click on a view frame, which opens View Properties.
- The object level settings apply only to the selected objects. You can select multiple objects at once and change their properties. Once object properties are changed on this level, they are no longer affected by higher-level changes.
6. Create Corner Chamfer On Steel Plates
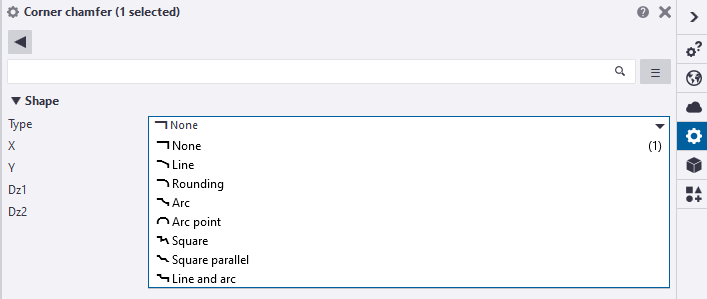
Creating corner chamfers is part of almost every steel project. Refining the shape of steel plates can be done for various reasons, including manufacturing, practical or aesthetics. To manually create a corner chamfer, double-click on a corner handle of the steel plate and the chamfer properties dialog will appear.
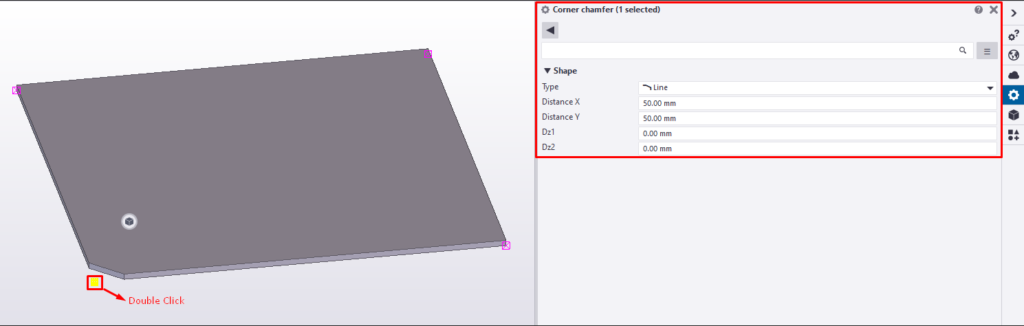
Choose the chamfer type and click modify. You can also apply the chamfer to multiple corners at once by selecting all the handles at the same time.
7. Importance Of Handles
Every part direction in Tekla Structures is indicated with handles. The handle of the starting point is yellow, and the endpoint is magenta. Handles are important in many ways. For example, Tekla Structures inserts part marks related to the handles; you can use them to modify a part end, etc. You can select multiple handles at once by holding ALT and window over the handles you want to be selected.
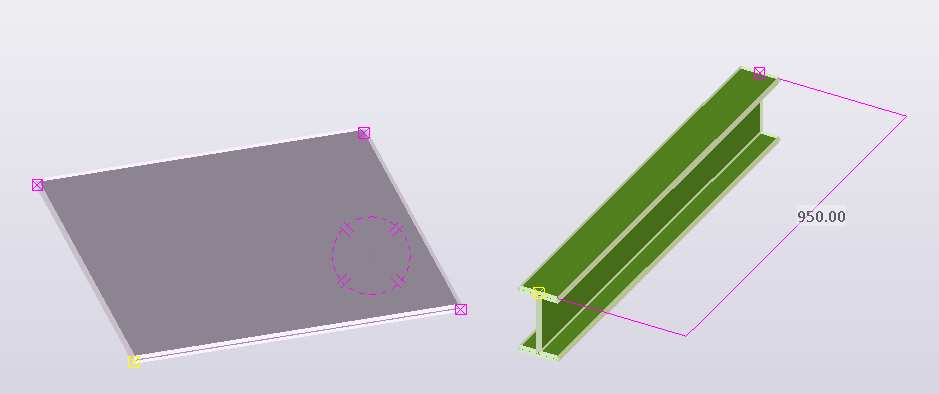
When you clone drawings or “copy to another object, ” always ensure the handles of the elements are in the same direction. You can use the swap handles macro to change their position if they are not.

If you read something you liked on our website, or we helped you with an issue, consider buying us a coffee!